Your home should be your safest place. Learn five practical modifications recommended by physical therapists that can dramatically reduce fall risk—without major renovation.

You’re not imagining it. Getting around your own home feels riskier than it used to. Maybe you’ve caught yourself grabbing the wall in the hallway, or you’ve started thinking twice before stepping into the shower. That hesitation? It’s your body telling you something needs to change.
Here’s what most people don’t realize: over half of all falls happen at home, in places you walk through every single day. But here’s the better news—most of those falls are completely preventable. You don’t need a full renovation or thousands of dollars. You need the right tweaks in the right places.
As in-home physical therapists working throughout Suffolk and Nassau County, we’ve walked through hundreds of Long Island homes just like yours. We’ve seen what works and what doesn’t. Let’s talk about five modifications that actually make a difference.
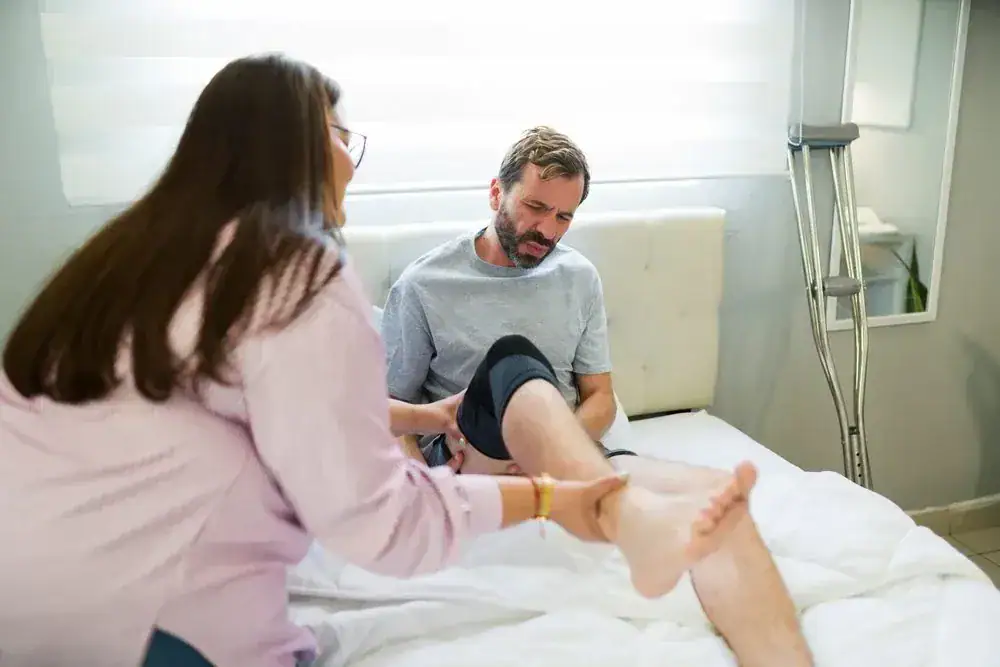
Walk into any home in Suffolk County or Nassau County, and the bathroom is almost always the biggest fall risk. It’s not just one thing—it’s the combination. Wet tile. Hard surfaces. The awkward movements required to get in and out of a tub or on and off a toilet.
The statistics back this up. Nearly 80% of bathroom falls happen during transfers—that moment when you’re stepping over the tub edge or standing up from the toilet. Your balance is already compromised, your hands are occupied, and one slip changes everything.
This is exactly why we start our home safety assessments in the bathroom. It’s where the risk is highest, but it’s also where simple changes deliver the biggest impact.
Grab bars aren’t just bathroom accessories. They’re the single most effective fall prevention tool you can install, but only if they’re in the right spots and properly anchored.
Here’s what we recommend during every home visit: grab bars on both the inside and outside of your tub or shower, grab bars next to the toilet, and if you have a long hallway to the bathroom, consider adding one there too. The goal isn’t to make your home look like a hospital. The goal is to give you something solid to hold when you need it most.
The mistake most people make? They buy suction-cup grab bars from the drugstore. Those might work for a hand towel, but they won’t hold your full body weight when you’re slipping. Professional installation into wall studs is non-negotiable. We’ve seen too many people get hurt trusting equipment that wasn’t properly secured.
Placement height matters just as much. The standard recommendation is 33 to 36 inches from the floor, but your physical therapist should measure based on your specific height and mobility. What works for someone who’s 5’2″ won’t work for someone who’s 6’1″. This is why in-home physical therapy makes such a difference—we’re assessing your actual bathroom, with your actual body mechanics, in real time.
And here’s something most people don’t think about: grab bars work best when you practice using them. During our balance training sessions, we’ll actually walk you through the proper technique for gripping the bar as you step into the shower or stand from the toilet. It sounds basic, but knowing exactly where to place your hand and how to distribute your weight can prevent that split-second loss of balance that leads to a fall.
If you’re in Nassau County or Suffolk County and you’re not sure where grab bars should go in your specific bathroom, that’s exactly what our home safety assessments are designed to figure out. Every bathroom is different. Every person’s needs are different. Cookie-cutter solutions don’t cut it.
Grab bars handle the transfer problem. Non-slip surfaces handle everything else. Because even with perfect grab bar placement, you’re still moving around on wet tile, and wet tile is unforgiving.
The simplest fix? Non-slip mats or adhesive strips inside your tub or shower. Look for ones with strong suction cups that actually grip the surface. You’ll know they’re working when you can’t easily slide them around with your foot. If it moves when you test it dry, it’s definitely going to move when you’re standing on it wet.
But don’t stop at the tub. The bathroom floor itself needs attention, especially right outside the shower where water splashes out. A good-quality bath mat with a rubber backing can make a real difference, but here’s the catch—it needs to lay completely flat. Any corner that curls up becomes a tripping hazard. If your bath mat won’t stay flat, get rid of it. A slippery floor is dangerous, but a mat that catches your toe is just as bad.
For people who really want to eliminate bathroom fall risk, we sometimes recommend textured vinyl flooring or slip-resistant tile for the entire bathroom floor. It’s a bigger investment than mats, but it’s permanent, it doesn’t bunch up, and it works even when wet. If you’re already planning bathroom updates, this is worth considering.
Here’s something we see all the time in our in-home physical therapy visits across Long Island: people buy all the right equipment but forget about maintenance. Non-slip mats collect soap scum and lose their grip. Adhesive strips wear down over time. Part of fall prevention is checking this stuff regularly. If you notice your mat sliding around or your strips peeling up, replace them immediately. Don’t wait until after you’ve had a close call.
And one more thing about bathroom safety—temperature matters too. Seniors often have thinner skin and slower reaction times to hot water. Make sure your water heater is set to a maximum of 120 degrees Fahrenheit. Burns from scalding water can cause just as much damage as a fall, and sometimes the reaction to hot water is what causes the fall in the first place.
Want live answers?
Connect with a Medcare Therapy Services expert for fast, friendly support.
Poor lighting is one of those hidden hazards that nobody thinks about until it’s too late. You’ve lived in your home for years. You know where everything is. You can navigate in the dark, right?
Except your vision isn’t what it used to be. Your eyes take longer to adjust when you move from a bright room to a dim hallway. And that split second of adjustment—that’s when falls happen.
The lighting fixes that make the biggest difference aren’t complicated. You just need to know where to focus your attention.

Here’s a scenario we hear about constantly from clients in Smithtown, Commack, and throughout Nassau County: you wake up at 2 a.m. needing to use the bathroom. You don’t want to turn on the bright overhead light because it’ll wake you up completely. So you try to navigate in the dark. Maybe you use your phone flashlight. Maybe you just feel your way along the wall.
This is exactly how falls happen. You’re half asleep, your balance is already compromised, and you’re moving through darkness. It’s a recipe for disaster.
Motion-activated night lights solve this problem completely. They plug into regular outlets, they turn on automatically when you walk by, and they provide just enough light to see where you’re going without blasting your eyes awake. The best ones have adjustable brightness and only activate in low-light conditions, so they’re not turning on during the day.
Place them along the path from your bedroom to the bathroom. One in the bedroom, one in the hallway, one in the bathroom itself. The goal is continuous lighting along your entire route, so you’re never taking a step in complete darkness.
For people who get up multiple times per night—something we address regularly during gait training sessions—this simple change is life-altering. You’re not fumbling for light switches. You’re not stubbing your toe on furniture. You’re just walking to the bathroom with enough light to see clearly, then walking back to bed. It sounds almost too simple to matter, but we’ve had clients tell us this single modification gave them more confidence than anything else we recommended.
The cost? Usually under $20 per light. The installation? Plug it in. That’s it. If there’s one modification on this list that delivers maximum impact for minimum effort, motion-activated night lights are it.
Beyond nighttime bathroom trips, your home needs good lighting everywhere you walk regularly. Hallways, staircases, entryways—these are the high-traffic areas where falls happen when lighting is inadequate.
Start with your stairways. You need light switches at both the top and bottom of the stairs so you never have to navigate them in darkness. If your stairs don’t have this setup, it’s worth hiring an electrician to add the second switch. And the lighting itself should be bright enough to clearly see each step and any changes in surface texture or color.
Many homes in Suffolk and Nassau Counties have beautiful hardwood stairs with subtle variations in color. That looks great, but it makes it harder to judge depth and distance, especially with poor lighting. If you can’t clearly see where one step ends and the next begins, you need brighter bulbs or additional light fixtures.
Long hallways present similar challenges. A single overhead light at one end often leaves the middle section dim. Adding a second light source or switching to brighter LED bulbs can eliminate those shadowy patches where you can’t quite see what’s on the floor.
Here’s something we assess during every home safety assessment: light switch accessibility. If you have to walk across a dark room to reach the light switch, that’s a problem. Consider adding lamps with easy-to-reach switches near room entrances, or look into smart switches that you can control by voice. Technology has made this easier than ever—you shouldn’t have to cross a dark room to turn on a light.
And don’t forget about glare. Older eyes are more sensitive to glare from bright lights or sunlight reflecting off shiny floors. If you have large windows that create glare during certain times of day, light-filtering curtains or blinds can help. The goal is consistent, even lighting that doesn’t create harsh contrasts or dark spots.
One more practical tip: keep a flashlight next to your bed. Power outages happen on Long Island, especially during winter storms. Batteries die in smoke detectors. You need a backup light source that doesn’t require you to navigate in complete darkness to find it.
You know what’s on your floors. The throw rug by the kitchen sink. The area rug in the living room. The stack of mail on the hall table that sometimes ends up on the floor. These things have been there for years.
That familiarity is exactly the problem. You stop seeing them as hazards because they’re part of your normal environment. But your physical therapist sees them immediately during a home visit. We’re trained to spot tripping hazards, and floors are where most of them hide.
The solution isn’t complicated, but it does require you to look at your home with fresh eyes.
Summary:
Article details:
Share: